My room mate and I have been thrift store shopping lately to try and find what we call "gems". We look for anything that has potential to be beautiful after a little TLC. I ended up buying a Mossimo 100% cashmere cardigan that looks like it has never been worn for only $2!! When I got home and googled, I found that I could sell this cardigan for an easy $30-$50. I don't own anything cashmere, so I think I will keep this gem for myself. It's a heather blue color
I also picked up another sweater for $2, which I am going to re-purpose into mittens and boot cuffs. I also bought a vintage frame, which had an artist print inside of it that I did not care for. I opened it up tonight and found that the artist was named Hubert Robert and the print was printed in the 70s. I'm thinking it is worth at least $40, but I'm not sure. Anyway, I am going to reuse the vintage frame by spray painting it a fabulous color.
Tuesday, November 15, 2011
Friday, October 14, 2011
Slouch Hats
I've been in love with slouch hats lately so I wanted to share my most recent creation
Here is the crochet pattern
Saturday, October 8, 2011
Personalized Clothing Tags
I've been wanting to make some custom clothing tags to add to all of my crocheted projects so I decided to look for some tutorials. I found two easy and fairly inexpensive tutorials! Tutorial #1, and #2. Looks like I will need to invest in some transfer paper.
Thursday, September 22, 2011
Meet Your New Crochet Instructor
I'm the new crochet instructor at a local Michaels craft store :) Yay I'm so excited!! Not only am I excited about teaching others how to crochet, I'm happy that I get to make money doing one of my hobbies.
Sunday, September 18, 2011
Crochet Baby Clothes
I have a friend who is pregnant and I have been waiting to crochet some baby clothes. So, here is my first finished project! A little boy sweatshirt.
I used this pattern.
There is much more to come!
Sunday, September 11, 2011
Glitter Sneakers
I am completely in LOVE with these Miu Miu glitter sneakers!
Since these beauties cost a whopping $450.00 at Nordstroms I am going to make my own pair! I saw a tutorial here, from blogger "Honestly, WTF" that made them look super easy to make. Instead of buying a pair of new Vans, I decided to use a pair of my grey Converse that I bought for $15.00 about 4 years ago.I already started them today and so far so good. I'm using Mod Podge Gloss & glitter from Martha Stewart. I'm using the following colors: crystal fine, hematite, onyx & sterling. When I'm all done I'll post a picture.
Sunday, September 4, 2011
Clearance to Brilliance
When I was shopping at TJmax a couple of weeks ago I stumbled upon the clearance section, which is my favorite section. I found 2 frames for only $0.70 and I had to have them! I was trying to think of what to do with them because I'm not a fame of "GR8". So, I decided to decoupage the first one with some scrapbook paper that I had to match my bathroom. I'm not sure what I'm going to do with the second one, but I'm thinking something sparkly!
Sorry the pictures aren't too great. I wanted to post this so I just took the pictures with my camera phone right now.
 |
| BEFORE |
 |
| AFTER |
Monday, August 15, 2011
My Upcycled Vintage Suitcase
A couple of months ago I found a suitcase for $5.99 and wanted to upcycle it. {Upcycling is the process of converting waste materials or useless products into new materials or products of better quality or a higher environmental value.} I used mod podge to cover the front and back sides of the suitcase and then I painted a varnish on top of that to seal everything. I added some ribbon and a suitcase tag that I got at Michael's for 60 cents. Overall, this project cost me around $15. A pretty cute suitcase huh?
Saturday, August 6, 2011
Vintage 1960's Floral Suitcase
A few months ago I was shopping in a local thrift store and found an awesome vintage suitcase. I think it's awesome at least! As soon as I saw it I knew I was going to give it to one of my friends for her birthday. She loves the store Anthropologie and this reminded of something she would like. I can't remember the exact price that I paid for this suitcase but it was either $5 or $8. Such a good find and my friend loved it for her birthday!
Saturday, July 30, 2011
Wednesday, July 27, 2011
I have a headache right now so the only good thing to do is browse other blogs for craft inspirations and ideas. Here are just a few.
Cork Vases & Containers
You can find the tutorial here.
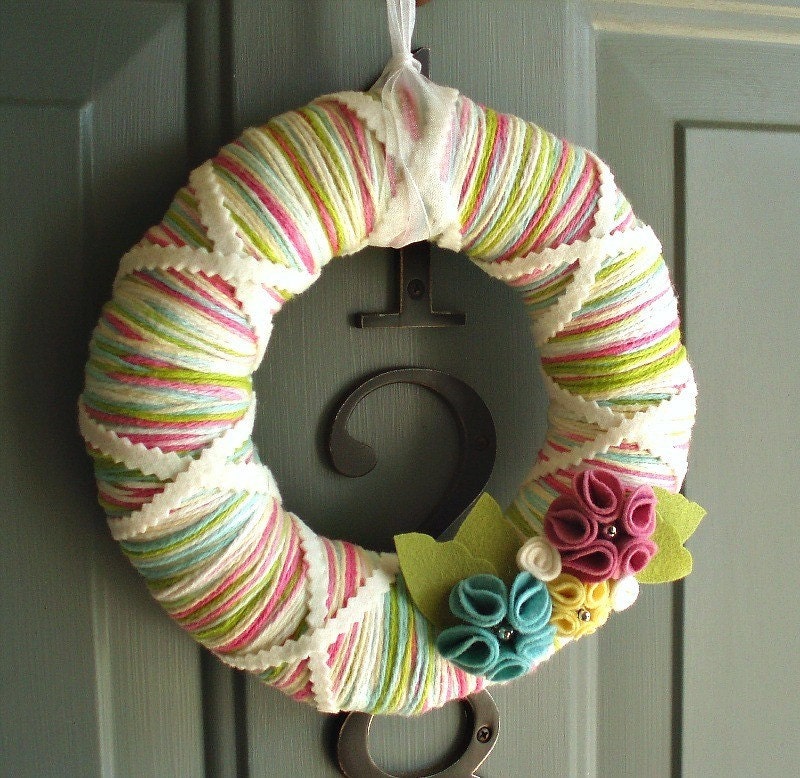
Yarn Wreaths
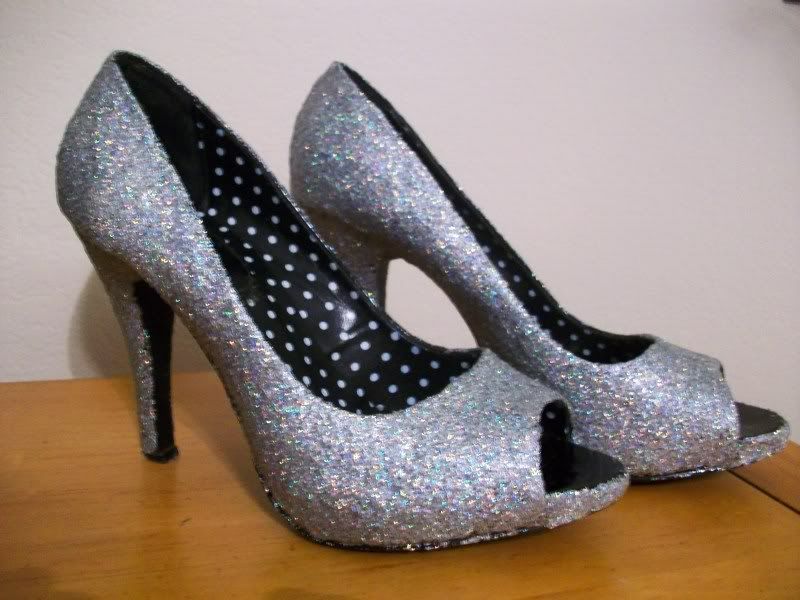
Mod Podge Glitter Heels
Frame Bulletin Board
Sunday, July 24, 2011
Revamped Old Furniture
One project that I've been wanting to do for a long time is to revamp old furniture. I needed a new desk so I found a old used desk on craigslist for $30 and a cute storage shelf furniture piece for $25 at a thrift store. The latches actually matched perfectly so I was excited because I wouldn't have to buy all new ones. The desk that I bought had one broken handle(which I'm hoping my grandfather can fix) and the top of it had a few big stains as you can see below. I went ahead and sanded it, prime painted it and painted it white. I then used mod podge to make a unique top of the desk. I simply painted a coat of mod podge onto the desk top, laid my fabric down and then painted a few coats of mod podge on top to seal it. I made sure to sand each layer a bit before puting the next coat on because it helps keep a smooth and shiny surface. I've been obsessed with mod podge furniture and this was the perfect time to try it out. With my other piece of furniture I just sanded and painted it. I really like how they turned out and it didn't cost me much to make this old furniture brand new.
 |
| BEFORE |
 | ||||
| After the paint and before the mod podge fabric detail work. |
 |
| BEFORE |
The other pictures are coming soon!
One word...wow! I can't believe how long it has been since I wrote on my blog. School has completely taken over my life. Now that I am nearing the end of my summer classes I want to give an update on all of my projects that I have been working on for the past...I don't know...6 months. It will take me a few days to at least gather all of the pictures but I wanted to start up again and do what I intended when I began this blog.
As for me...in the past few months I moved into a new apartment with a new wonderful roommate, adopted a kitten that I named Winston, turned 21, and I am finishing up my rotation in the labor and delivery unit in nursing school. That is just the new "exciting" information I guess.
 | |
| My mom bought me this cute little flag for Easter. It now welcomes everyone into my new apartment |
Friday, March 11, 2011
Vintage Suitcases
I've decided that I'm going to "upcycle" a vintage suitcase on my own. I've been wanting to make something like this and I stumbled upon this idea. I love the thought of making an old and ugly object into something that is newly redecorated and pretty. Jennifer Perkins converted a vintage suitcase into a laptop case. She gives a great tutorial.
I went to the thrift store yesterday and found one just like in the picture for $5.99. Not bad right? I gave it a thorough cleaning; might I add that it smells very old!! I plan on tearing out the inside and reupholstering it over my spring break. I'm going to paint it and then cover the side panels with fabric. I'm drawn to amy butler's designs so I'll have to see what I can find.
 |
| The unattractive and old interior |
I also found another example of a re-vamped vintage suitcase. Anyway, here is the link for the suitcase pictured below. Betty did a great job!
 | ||||||||||||||
Tuesday, March 1, 2011
I was so excited when I had finished this toddler owl hat over winter break. I saw a pattern on ravelry just like this but I was not willing to pay for the pattern so I created it on my own. I think that they look really similar. I know that my picture isn't high quality but I wanted to share it anyway.
 |
| My Version |
 |
| http://www.ravelry.com/patterns/library/owl-earflap-beanie |
Friday, February 18, 2011
Another Free Pattern
I was extremely surprised with the popularity of my very first crochet pattern. Because of this I have decided to offer another FREE crochet pattern. This cowl will definitely keep you warm this winter/spring. You can find this pattern on ravelry here. I would love to get your feedback. Thanks!
Enchanted Orchid Cowl
Created by Brittany McKelvie
Materials
Size 6.5 (k) mm crochet hook
1.5 skeins of worsted weight yarn (I used Caron Simply Soft)
· 470 yards/255 grams
Abbreviations
sc = single crochet
dc = double crochet
tr = treble crochet or triple crochet
sl st = slip stitch
Instructions
After each row, join with a sl st into the top of the chain 1, 2 or 3.
Chain 180
Row 1 & 2: chain 2, dc in the round
Row 3: chain 1, sc in the round
Row 4: chain 3, tr in the round
Row 5: chain 2, dc in the round
Row 6: chain 1, sc in the round
Row 7: chain 2, dc in the round
Row 8: chain 3, tr in the round
Row 9: chain 3, tr in the round
Row 10: chain 2, dc in the round
Row 11: chain 1, sc in the round
Row 12: chain 2, dc in the round
Row 13: chain 3, tr in the round
Row 14: chain 1, sc in the round
Row 15 & 16: chain 2, dc in the round
Wednesday, February 16, 2011
My Very First Crochet Pattern
Hey Everyone!
I just wanted to share a crochet pattern that I created today. I have been making a lot of cowls lately because they are so easy to make and felt like making my own. This pattern is for personal use only. If you have questions feel free to ask. You can find my pattern on ravelry.com here. Enjoy!
I just wanted to share a crochet pattern that I created today. I have been making a lot of cowls lately because they are so easy to make and felt like making my own. This pattern is for personal use only. If you have questions feel free to ask. You can find my pattern on ravelry.com here. Enjoy!
@ Under An Hour Cowl ?
Materials
Size 9mm (N) crochet hook
1 skein bulky/12 ply weight yarn, 109 yards/100 grams
(I used Loops & Threads "Charisma")
(I used Loops & Threads "Charisma")
Abbreviations
sc = single crochet
dc = double crochet
tr = treble crochet, or triple crochet
sl st = slip stitch
Instructions
Chain 74
Join together in the round with a sl st
Row 1: Chain 3, work tr in each chain space around. Join with sl st to the top of chain 3.
Row 2: Chain 2, work dc in the tr spaces from the previous row. Join with sl st to top of chain 2
Row 3: Chain 1, sc across in the dc spaces from the previous row. Join with sl st to top of chain 1
Row 4: Chain 3, tr across in sc spaces from the previous row. Join with sl st to the top of chain 3.
Row 5: Chain 1, sc across in tr spaces from the previous row. Join with sl st to the top of chain 1.
Row 6: Chain 2, dc in the sc spaces from the previous row. Join with sl st to the top of chain 2.
Row 7: Chain 1, sc across the entire row. Join with sl st to the top of chain 1.
Thursday, February 3, 2011
Despite being busy with homework and school, I have found a few minutes every day to work on my current projects. I'm working on a crochet scarf right now and am almost finished with a blanket that I have been crocheting for quite a while now. I'll post a picture when I am all finished, which should be within the next week or so. It's going to be the size of my queen size bed, which will be plenty long for my tall frame. I followed a pattern tutorial that can be found here. The creator, Mikey, has 10 video's posted on youtube.com that show you step by step instructions. This jumbo catherine pinwheel stitch is very fast to crochet and is a nice pattern. I used teals and purples...two of my favorite colors. Truthfully, the reason why I have not completed this blanket yet is because I am always starting new projects, which my roommate can attest to. Haha. It will be finished just in time to utilize it for the few months us Southern Californian's have of "cold" weather.
Tuesday, January 18, 2011
So I've been working on a few sewing tutorials the past few days and wanted to share my updates. I spent a few hours working on the art journal and almost finished it. When I was pressing it a little bit, I accidentally ironed over part of the elastic. I'm a little frustrated now because the elastic has shrunk from the heat and I have to do it over again because it doesn't look right...I'm a perfectionist at times. After this let down, I had to move on to something else. I chose to try another tutorial from littlebiggirlstudio, which is a patchwork pencil pouch. It took me about an hour yesterday to whip this together. Here is the finished product.
 |
 | |||
| Now I won't lose my crochet hooks |
Friday, January 14, 2011
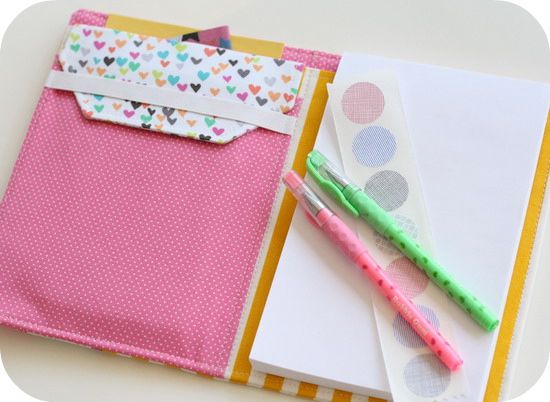
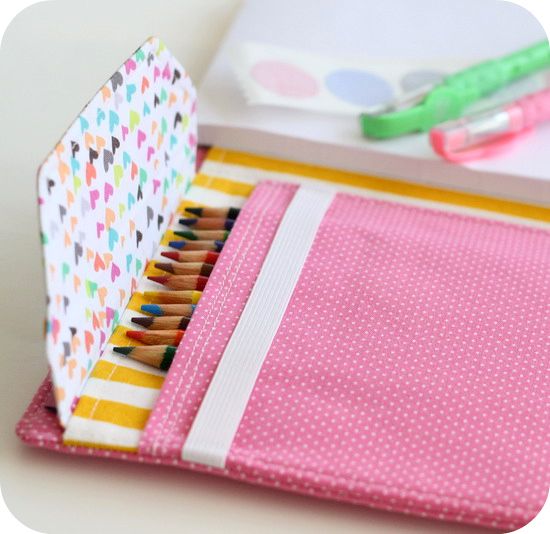
I found this journal tutorial by littlebiggirlstudio. I think it is adorable and of course, I would like to make one. Take a look at the pictures. It looks like it will be time consuming but totally worth it. I could see myself using this as a planner or notebook. I love how there are so many pockets and room for writing utensils.
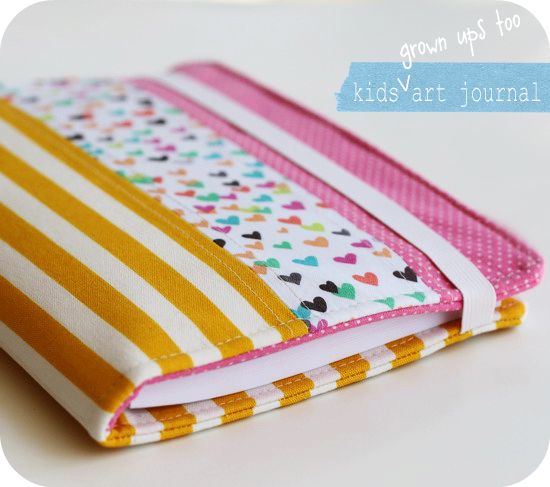 |
| By the way, I would use this as an adult journal =) |
Subscribe to:
Comments (Atom)


